This post is 778 words, a 3 min and 6 second reading time. It is the third lesson of Simmering, Steaming, & Poaching (How to Boil Water II). It is also a part of the MaxF Meal Prep Collection.
📍 Introduction:
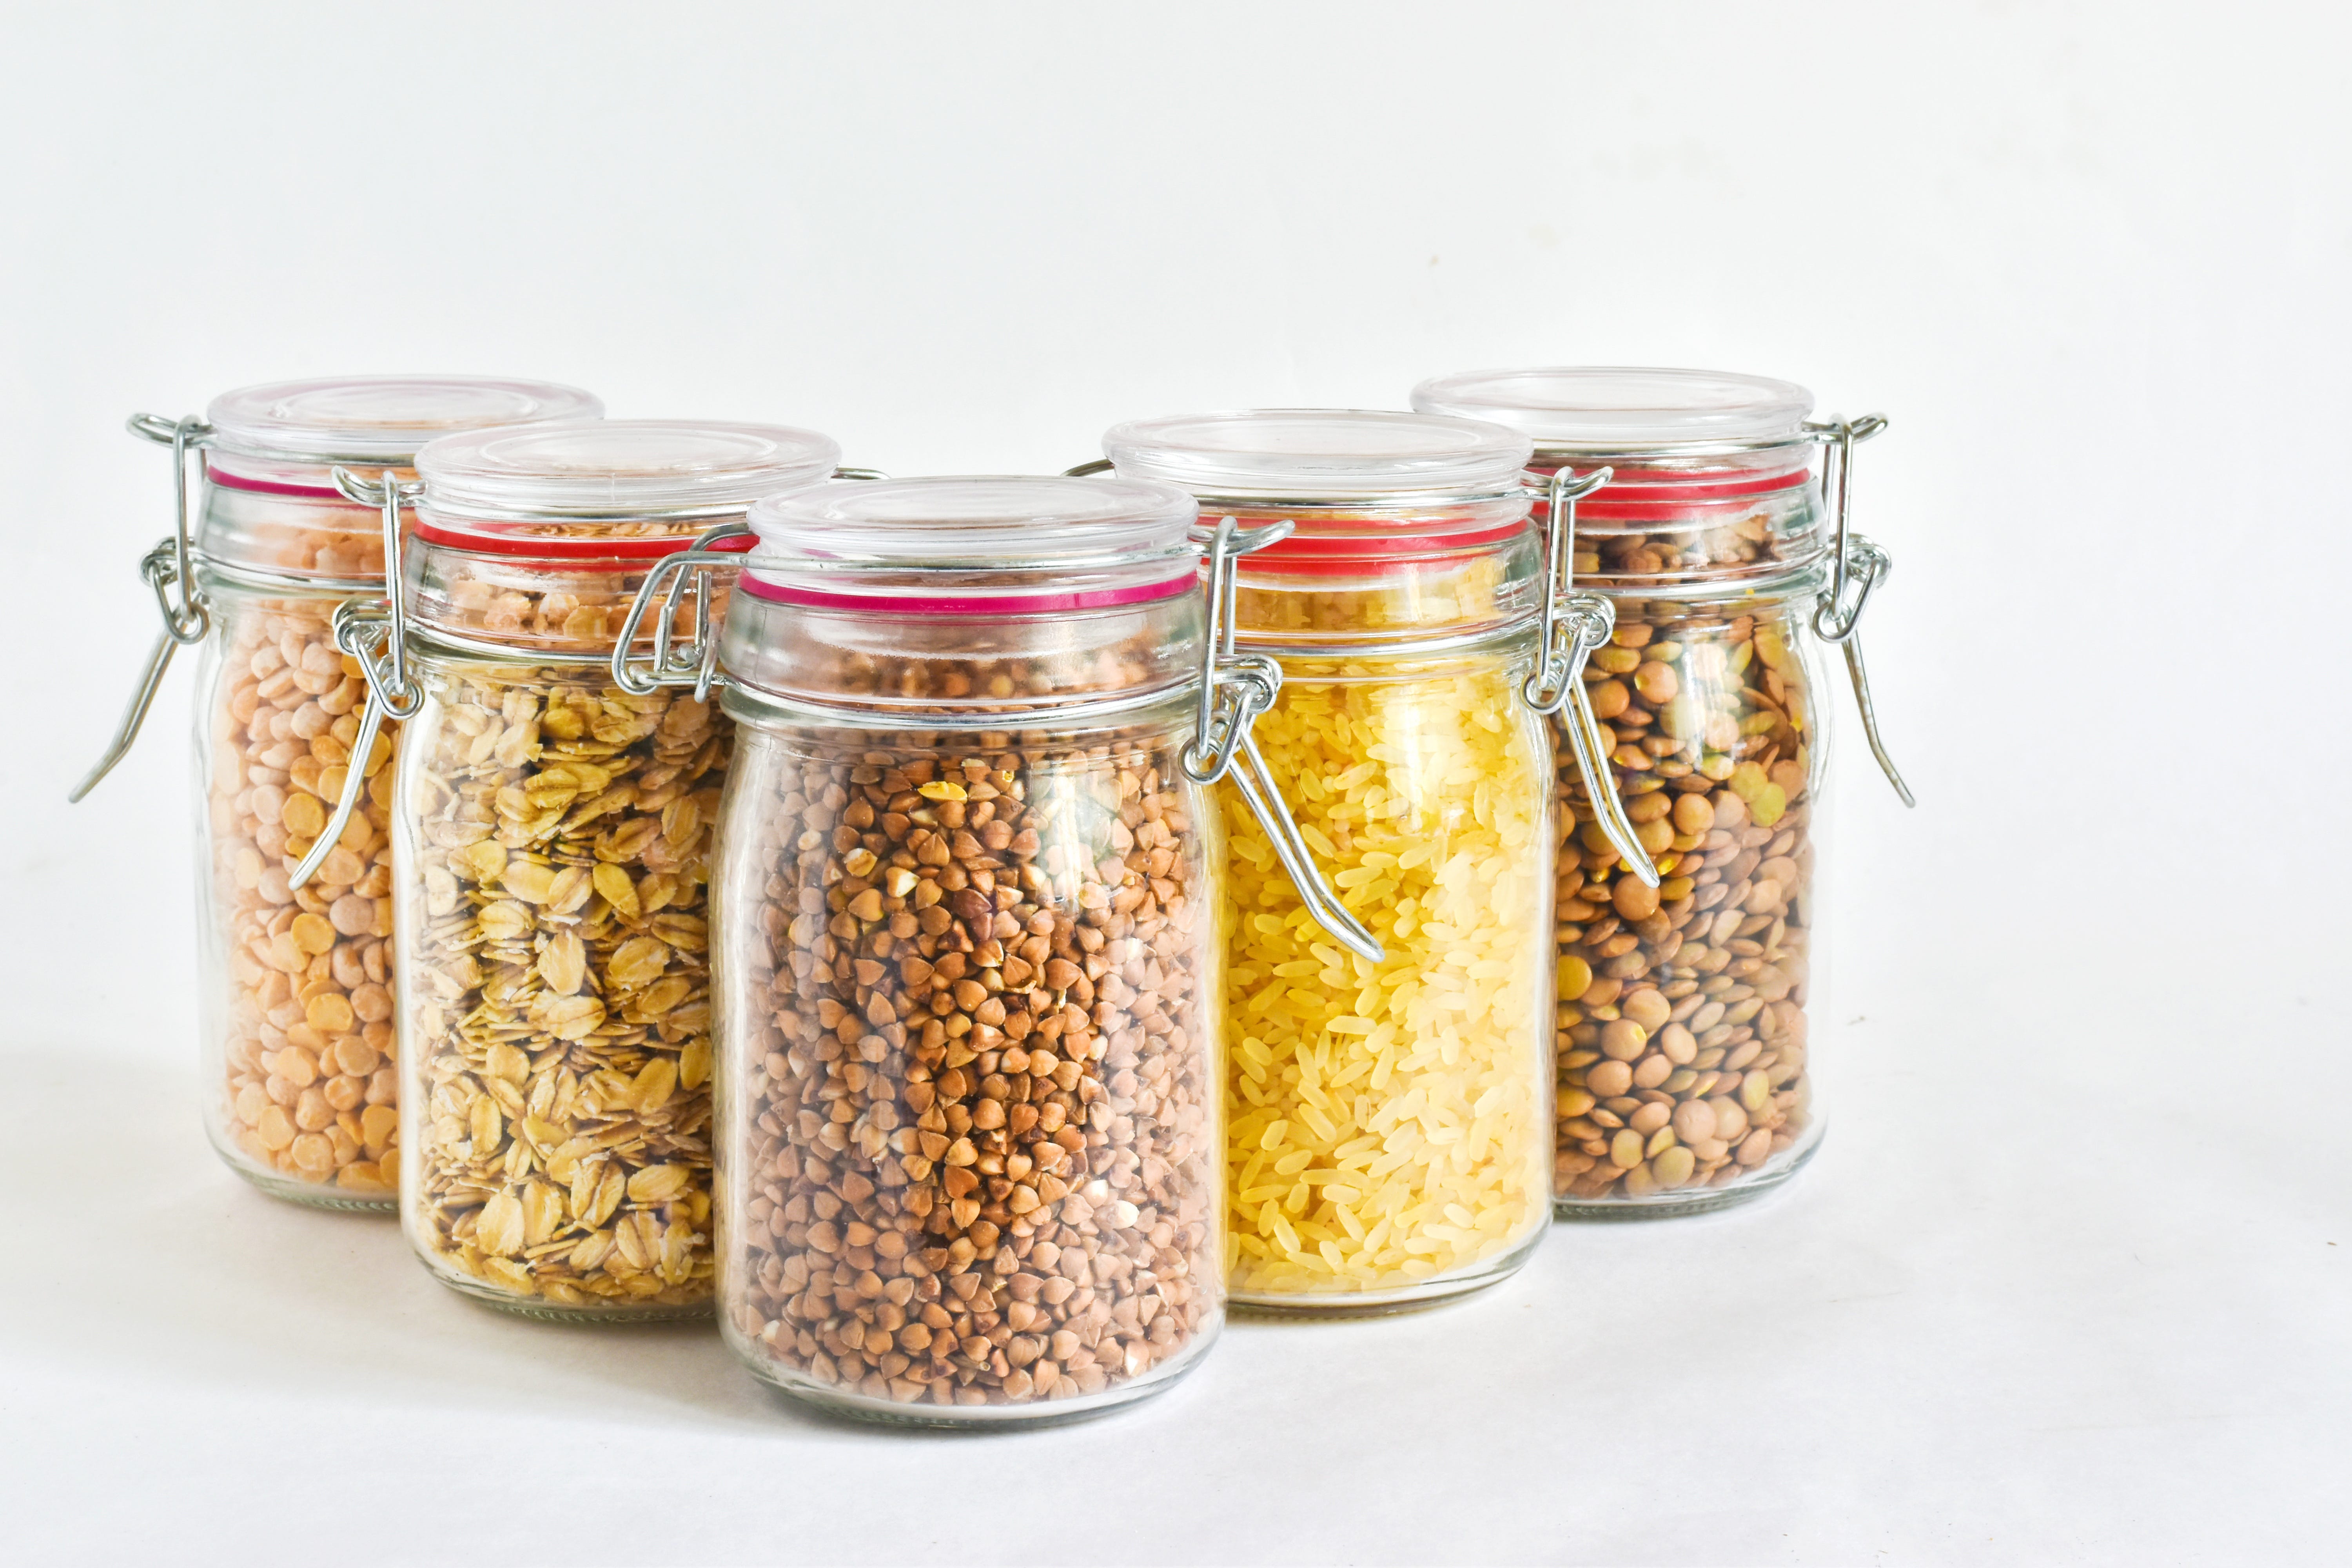
Knowing how to cook grains is an invaluable skillset worth having in your back pocket. When you memorize the main principles of cooking grains, you can:
Buy in bulk & store grains in containers without instructions.
Save money. Pre-cooked/frozen grains are marked up significantly.
Get into a flow. Savor the experience of cooking without referring to directions frequently.
There are three primary approaches to cooking grains - simmering, steaming & boiling. Each method hydrates & cooks the grains. They vary in the way they approach temperature, water & time.
☝️ The 3 Primary Cooking Methods:
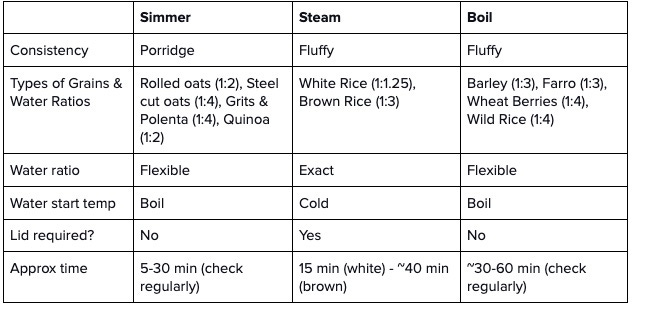
Simmer: Creates porridge consistency. Recommended method for oatmeal, polenta/grits & quinoa. Requires regular attention & stirring.
Steam: Creates tender & fluffy consistency. Best for brown & white rice. Requires a snug lid & careful measuring of water.
Boil: Best for hearty grains (e.g., barley, farro). Requires some monitoring. Mesh sieve/fine strainer required.
🧂 Ingredients:
Grain
Water or stock
Salt (optional)
⚙️ Gear:
Stockpot & lid
Fine mesh sieve (optional)
✅ Instructions:
Simmering Method:
Bring water to a boil.
Slowly pour in grain and reduce heat to a gentle simmer (e.g., steady & gentle "champagne bubbles")
Occasionally taste and add water if necessary (e.g., to thin porridge & avoid scorching).
Stir occasionally until water is absorbed by the grain and desired consistency is achieved.
Steam Method:
Bring water and grain to a boil over high heat.
Reduce to medium-low for a gentle simmer.
Cover, and simmer until liquid absorbed.
Turn off heat and let rest covered for 10 minutes; fluff with a fork.
Boil Method:
Boil a pot of water and add salt so that you can taste it (e.g., light seawater flavor).
Add grains.
Bring to a low boil and taste every ~5-10 min until done (~10-30 min).
When desired tenderness is reached (e.g., al denté), drain in a fine-mesh sieve/strainer.
Return to pot, cover & rest for 10 minutes.
Fluff with fork & serve.
📓 Grain Cooking Reference Guide
📝 Notes Tips & Tricks
Prep:
Most grains (and especially rice & unwashed quinoa) benefit from being rinsed before cooking. This removes debris & dust, making for fluffier, cleaner-tasting grains.
To rinse, put grain in a bowl, cover with water, swish around with your hands, then pour the water off. Repeat until the water runs clear, then pour through a strainer.
Grains typically expand ~2-3x when cooking. A typical serving size for a side is ½ cup cooked, and thus ~¼ cup dry. For a grain bowl, assume 1 cup cooked, so ~½ cup dry.
For added flavor, cook with broth (e.g., chicken, vegetable). Alternatively, for a quick hack, use part of a bouillon cube (like these).
Salt & seasoning is personal, but a rough guide is ½ teaspoon salt per 1 cup uncooked.
Stirring spoons: if using a nonstick pot, do not use a metal spoon as it can scratch the surface. If using plastic, ensure it is sufficiently heat-proof, or it may melt. Wooden & silicone are recommended.
Cooking:
If the grain is too al denté: return to a covered pot to "carry-over" for a few min. To soften further, add some water, cover, and place on a low flame for 5-10 min.
If the grain is overcooked (e.g., mushy): spread it out in a single layer on a plate or sheet tray to accelerate cooling and evaporation.
A mushy outside & tough interior means that the grain is not fully cooked and needs more time. It may be the result of cooking too hot/fast. Better to cook more slowly at a lower temp.
For fail-proof results, consider investing in a rice cooker. They work for all grains, including oatmeal. Reduce water slightly (e.g., 1:1 for rice) because little water is lost.
Serving & Storage:
To meal-prep a grain for multiple purposes/flavor profiles, keep flavorings to a minimum during cooking & dress the grains before serving.
Popular dressings/additions include: chopped herbs (e.g., parsley, cilantro, dill) or nuts, olive oil, salt, lemon, cheese.
Storage: grains last ~4 days refrigerated in airtight containers. Use the sniff test to know when they have gone bad. To prevent sticking, add a drizzle of olive oil.
To freeze, let grains cool and then pack in airtight containers. They keep for ~4-6 months.
For meal prep, consider the size of the storage container. Double portions work well for small households.
🛍 Purchasing Recommendations
🎓 Further Study
10 Quinoa Recipes [Cookie & Kate]
39 Polenta Recipes [Epicurious]
29 Polenta Recipes [Cooking Light]
——————————————————
✏️ Did you like this lesson? Loved it! ⭐️ · Pretty good 🤷♂️ · Could be better 😐
🎧 Prefer to listen? Subscribe on iTunes, Spotify, or Overcast.
🎳 Lesson Team: Michelle Tandler (Research) & April Word (Expert Chef)
🍳 Want to learn more? Check out the Table of Contents.